

Making a meat stock or broth is very easy. It takes a little time but it is worth every minute of simmering wait to have this tasty homemade liquid ready for any recipe or gravy.

So, what is the difference between stock and broth? Stock typically is not seasoned, i.e., salt and pepper. Broth is made from stock and then seasoned. I normally always put peppercorns in but I never know what I am going to make from it so I personally don’t season with salt for use as a base for future cooking. Herbs are a must though. I just wanted to pass that little diddy on to you.

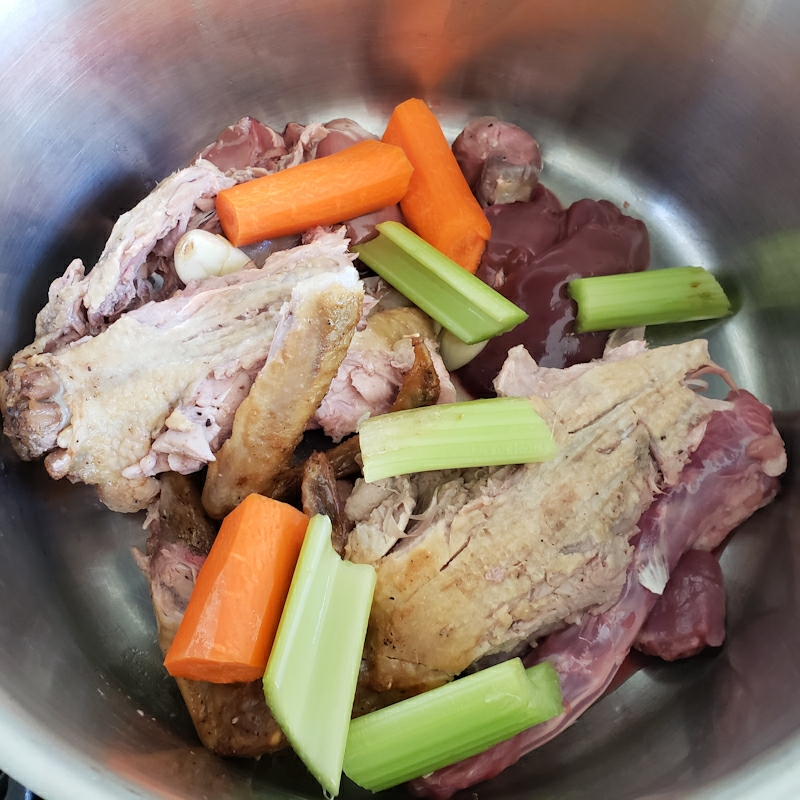

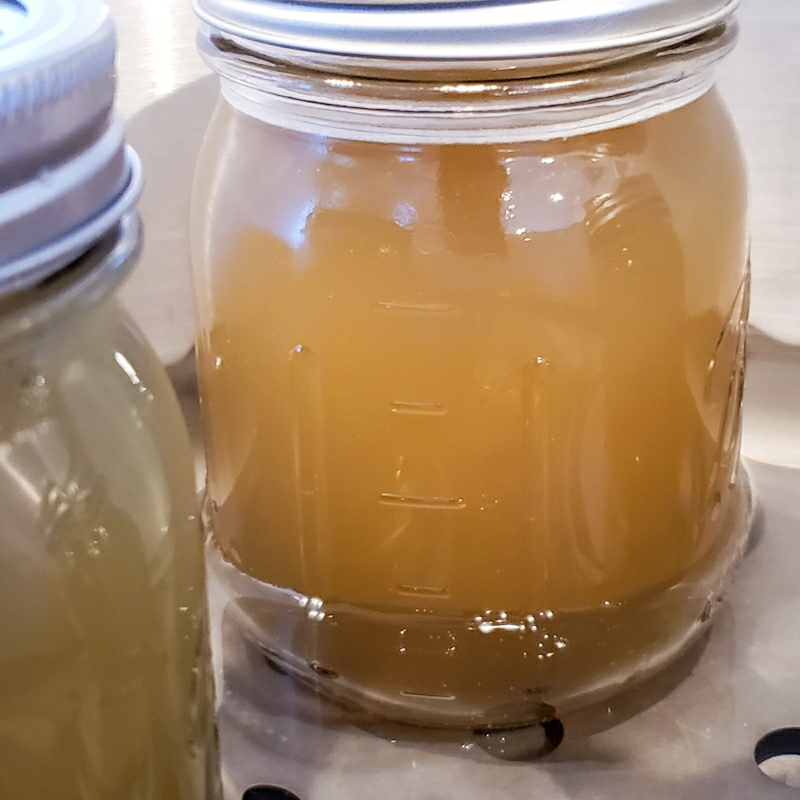
My basic recipe: Just add celery, onions, garlic, carrots, and a carcass of chicken, duck, turkey, or beef bones, bay leaves, springs of thyme and parsley to a stock pot and simmer for a few hours. Skim the foamy tops off periodically the first two hours-ish and then simmer for a few hours more covered. I simmer all night covered. Some simmer for just a couple of hours, but I like to get all the flavors of the vegetables and herbs ripping through the stock. Next, strain it good and place in the refrigerator for a few hours to set up the fat on the top. After cooling, skim off the fat. Bring it back to the stove to a small boil and ladle into jars for either canning or freezing. That’s it.
The bit that comes after is up to you. It can be frozen easily and if you are like me, pressure canning ensures a lengthier shelf life and is worth the time to do it. Take note that stock/broth cannot be water-bathed canned, only pressure canned.

Freezing: After straining, de-fating, and cooling, pour into jars and freeze. It is as simple as that and many who do not want to venture into the pressure canning world can do this with ease.


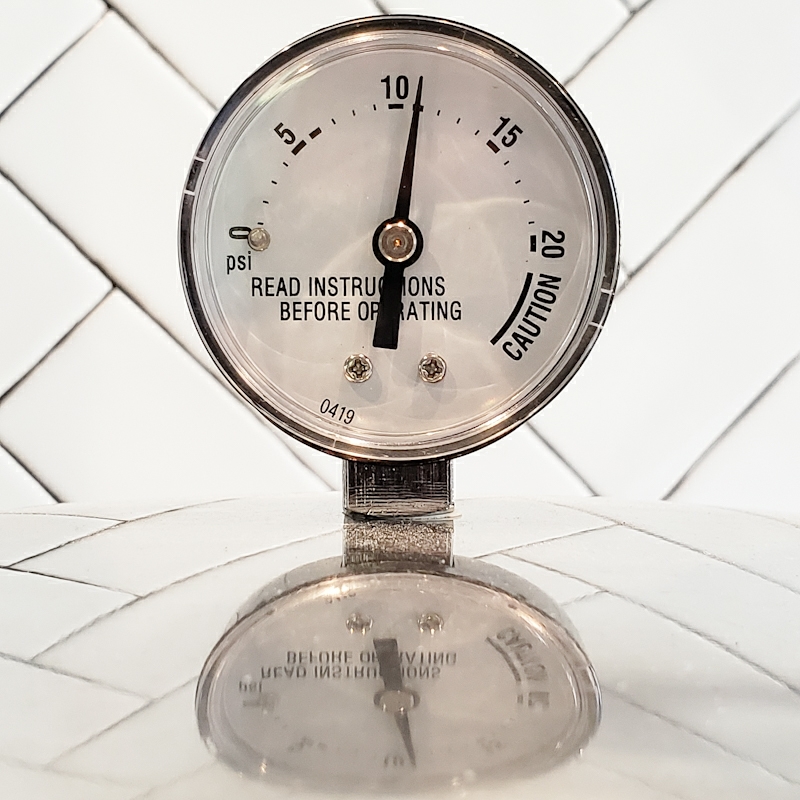


Pressure Canning: It is important to can certain foods certain ways. Because of the difference in canning equipment, altitudes, and what is being canned, I am going to refer you to the NCHFP (National Center For Home Food Preservation) page for reference in what they recommend. I use this site every time I process foods to preserve in order to ensure I am doing it the recommended way each time. I will tell you I was scared to death when I first started to preserve foods via canning equipment, but after the first go of it I became a fanatic and now find it so convenient to do, but I definitely refer back to this site every time I preserve to see any updates and refresh.

Basic Stock instructions

Prep Time: @20 mins
Cook Time: @8 Hrs.
Equipment
- Large Stock Pot
- Pressure Canner
- Freezer
Ingredients
- 1 Carcass Your Choice (Beef, Chicken, Duck…)
- 4 Carrots Large
- 4 Celery Stalks Cut in half
- 1 White Onion Large – Quartered
- 6 Cloves of Garlic Smashed
- Spices To Taste
- 2 Bay Leaves
Instructions
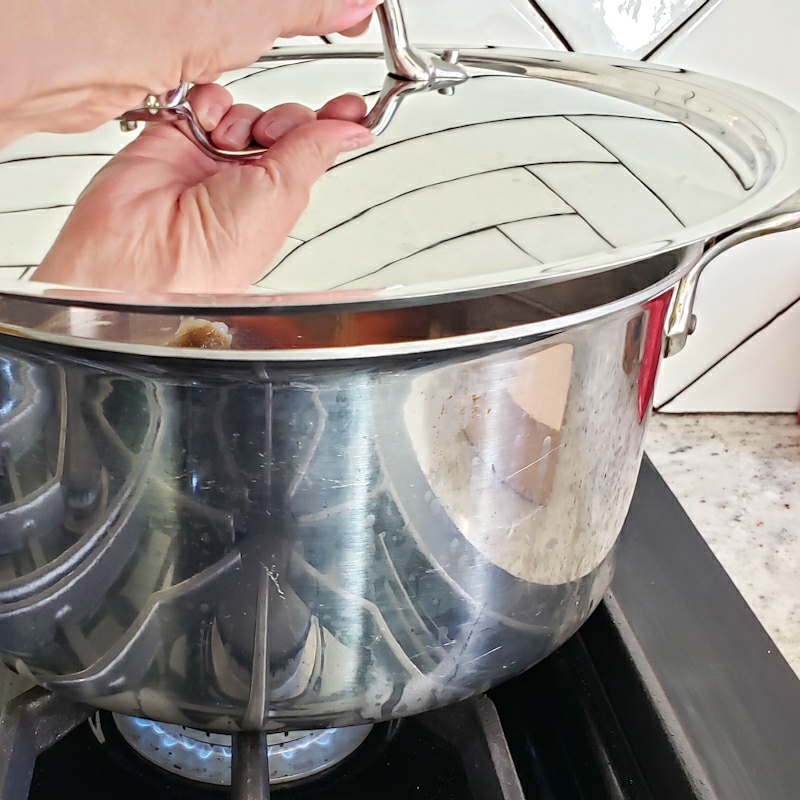
- Place all ingredients in a large stockpot, cover with water and simmer for at least 2 hours. *Timing varies* I cook mine for a about 2 hours-ish to skim off any frothy top that may be bubbling up, then I simmer the whole bunch overnight.
- Remove from stove and let cool a bit.
- When the stock is done, strain it. Strain it good.
- Let the strained stock cool a bit and then put it in the refrigerator.
When cold, skim off the fat on top. - At this point either freeze the stock or pressure can.
If you are freezing, just load the jars up and freeze.
If you are canning, read on and the ‘Notes’ below. - Pressure: Put the stock back into a pot and heat it up to a boil.
- Pressure: Turn off the stove and fill warm sterilized jars and pressure can.
Pressure Canning: If you are canning…refer to the instructions for the rest of the steps at the NCHFP (National Center For Home Food Preservation) website and your pressure canner instructions.
Notes
Refer to the National Center For Home Food Preservation for canning regulations. Altitude matters when canning and so does your type of canner. However, it is very simple to follow those instructions to preserve your favorite stocks. Please also refer to your pressure canner instruction booklet. Prep is everything with jars and lids. Boil the jars for sterilization about 10 minutes then fill them while they are hot. Wipe the rims before putting on the lids.Enjoy!
Okay, so that is Mrs. Shecky’s generic base recipe for stock, however you can spruce it up with any veggies for flavor. It is always great to have your own homemade stock as it just tastes better and you actually know what is in it. This basic recipe can have more or less vegetables depending on how robust you like it.
From Mrs. Shecky’s Kitchen to yours,
Enjoy!
Mrs. Shecky

Leave a comment